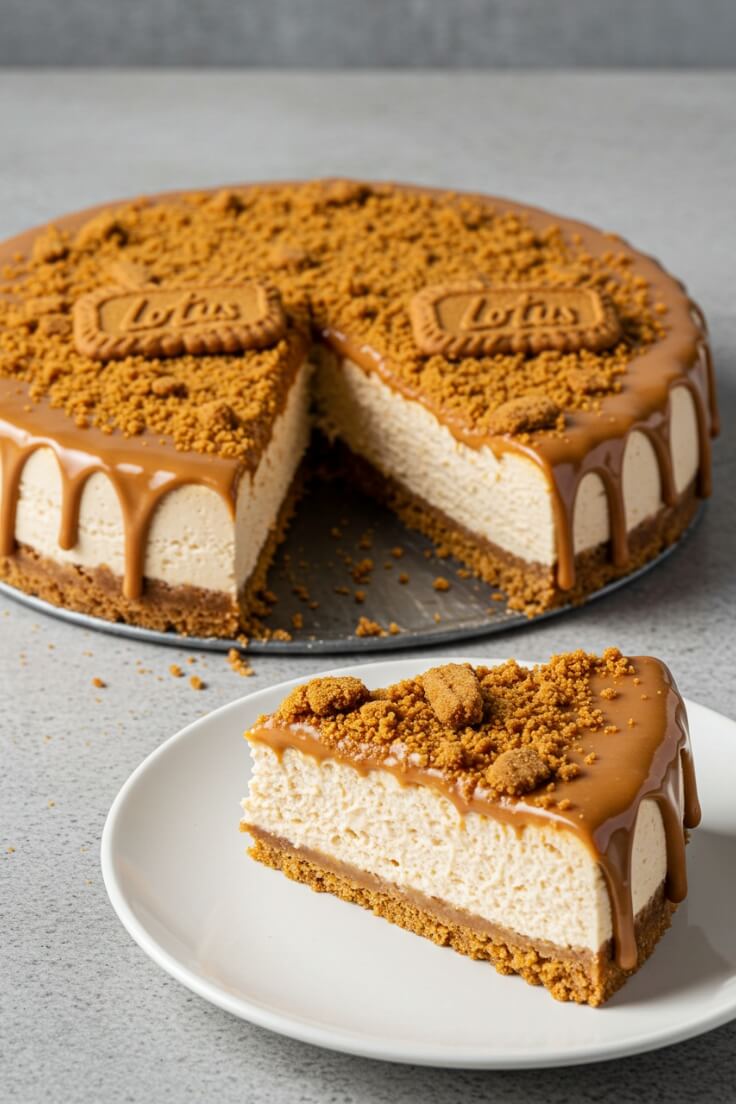
No-Bake Lotus Biscoff Cheesecake is a dreamy, indulgent dessert with a buttery Biscoff cookie crust, a creamy spiced filling, and a rich Biscoff spread topping. This no-bake recipe is perfect when you want something impressive and delicious without turning on the oven!
This dreamy no-bake Biscoff acheesecake is rich, creamy, and layered with cookie butter magic—easy to make, hard to resist! 🍰✨🧡
Why This No-Bake Lotus Biscoff Cheesecake Is the Best
- No Oven Required: Ideal for warm days or quick dessert prep.
- Biscoff Cookie Crust: Made from crushed Lotus Biscoff cookies and butter for a caramelized, spiced base.
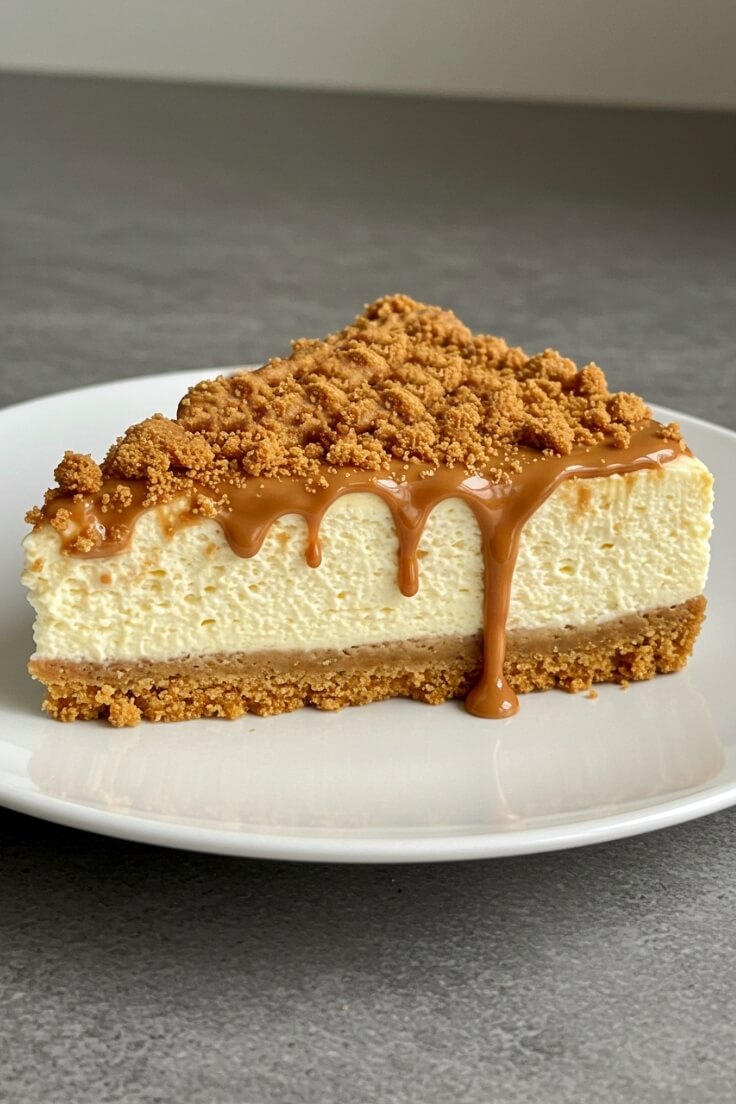
- Ultra-Creamy Filling: A smooth, no-bake cheesecake layer infused with Biscoff spread and a hint of vanilla.
- Biscoff Glaze Topping: A glossy layer of melted Biscoff spread finishes the dessert with elegance and extra flavor.
- Stunning Presentation: Garnished with crushed cookies and whipped cream swirls, it looks like it came from a high-end bakery.
It’s wholesome, satisfying, and makes the perfect cozy side or main—perfect for weekend gatherings, birthday celebrations, or serving a dessert that pairs beautifully with gourmet coffee or premium tea.
Ingredient Notes
For the Crust:
- Lotus Biscoff cookies create a deeply caramelized, spiced cookie crust that’s sweet, crunchy, and the signature flavor foundation.
- Melted unsalted butter binds the crushed cookies together, creating a firm, sliceable base once chilled.
For the Filling:
- Heavy whipping cream adds lightness and helps create a smooth, mousse-like cheesecake texture.
- Cream cheese provides a tangy richness and creamy body for the cheesecake base.
- Lotus Biscoff spread infuses the filling with warm, spiced cookie flavor and a silky texture.
- Powdered sugar sweetens the filling and helps it whip up smoothly without any graininess.
- Salt subtly enhances the overall flavor and balances the sweetness.
For the Topping:
- Remaining Lotus Biscoff spread is gently melted and poured over the set cheesecake for a glossy, flavorful finish that ties the entire dessert together.
FAQs
How far ahead can I make this cheesecake?
You can totally make it up to 2 days in advance—super handy if you’re prepping for a party! Leftovers? Pop them in the fridge and they’ll stay fresh for up to 5 days.
Can I freeze it?
Absolutely! I froze a slice in an airtight container for 10 days, and it thawed like a dream. Bonus tip: try it semi-frozen for an ice cream cake vibe. It’s seriously good.
What cream cheese do you use?
If you’re using Philadelphia, make sure it’s the brick kind, not the spreadable tub version. And whatever brand you choose, make sure it’s full fat for the best texture and taste.
Can I use the crunchy Lotus Biscoff spread?
I haven’t tested it myself, but it should work just fine! Crunchy bits might even add a fun twist.
What if I don’t have Lotus Biscoff?
No worries—you can use any cookie butter brand you have on hand. It’ll still taste amazing!
Can I swap Lotus Biscoff with peanut butter?
Yep! Peanut butter works as a swap. Just keep in mind it’s less sweet, so you’ll likely want to add a bit more powdered sugar to balance it out.
Is Cool Whip okay instead of whipped cream?
I haven’t personally tried it, but yes—you can use Cool Whip! Just grab one 8oz container and you’re good to go.
I like my cheesecake super dense. Any tips?
Skip the whipped cream for a denser texture. If you do, you might want to increase the filling by about 1¼ to 1½ times to keep that rich, full cheesecake feel.
Why no gelatin?
Good question! the cheesecake is stable enough without it—soft and creamy, but it holds its shape. I wanted to keep things easy and fuss-free. If you want it firmer, you could try adding gelatin, but I haven’t tested that version myself yet.
Serving Suggestions
- With a Cup of Espresso or Latte: The caramelized Biscoff flavor is a natural pairing with coffee.
- With Fresh Berries: Adds color and freshness to each creamy bite.
- With a Scoop of Vanilla Ice Cream: Doubles down on indulgence.
- Cut into Mini Squares: Serve as bite-sized party desserts or holiday sweets.
- Drizzle with Chocolate Sauce: For a Biscoff-meets-chocolate twist.
A Must Try
This No-Bake Lotus Biscoff Cheesecake is the ultimate dessert for Biscoff lovers—rich, creamy, spiced, and beautifully layered without any baking involved. Every bite melts in your mouth with smooth cheesecake, cookie crunch, and that iconic Biscoff warmth. Whether you’re hosting a dinner party or satisfying a personal dessert craving, this treat will impress every time. Make it once, and it’ll become your signature no-bake favorite!
This dreamy no-bake Biscoff cheesecake is rich, creamy, and layered with cookie butter magic—easy to make, hard to resist! 🍰✨🧡
Be sure to check out these other delicious recipes!
-
Oreo Cheesecake
-
Peanut Butter Cheesecake
-
Pistachio Cheesecake
-
Raspberry Cheesecake
-
Strawberry Cheesecake
No Bake Lotus Biscoff Chesecake
Ingredients
FOR THE CRUST:
- 30 Lotus Biscoff cookies 235g
- 6 tbsp 3oz/ 85g unsalted butter, melted
FOR THE FILLING:
- 1 cup 235ml heavy whipping cream, very cold
- 12 1/3 oz 350grams cream cheese, at cool room temperature
- 1 cup 260grams Lotus Biscoff spread (aka Speculoos or any cookie butter)
- 2/3 cups 75grams powdered sugar
- 1/8 tsp salt
FOR THE TOPPING:
- The remaining 140grams heaping 1/2 cup of the Lotus Biscoff spread jar
Instructions
To Make the Crust:
- Start by preheating your oven to 325°F (160°C) and move the oven rack to the middle position. Line the bottom of a 9 or 10-inch springform pan with a round of parchment paper—this helps everything release cleanly later.
- Now, grab your Lotus Biscoff cookies and crush them into fine crumbs. A food processor makes this super quick, but if you don’t have one, no worries—just pop the cookies into a large zip-top bag and smash them with a rolling pin or even a meat mallet. Fun and therapeutic!
- Pour in the melted butter and stir until the crumbs are evenly coated. Scoop out 1/4 cup (50g) of this buttery goodness, place it in a small bowl, cover it with plastic wrap, and stash it in the fridge—you’ll use it later for a pretty garnish.
- Take the rest of the crumb mixture and press it evenly into the bottom of your prepared pan. Use the bottom of a drinking glass or measuring cup to really pack it down and make it nice and flat.
- Pop it in the oven and bake for 8 to 9 minutes, just until the crust smells amazing and has a slightly deeper golden color. This quick bake helps it set better and gives it a richer flavor and crunch—but if you’re in a hurry, you can skip this step!
- Let the crust cool completely before adding your filling. If you’re short on time, stick the pan in the freezer to speed things up while you get started on the cheesecake filling.
To Make the Filling:
- In a large chilled bowl, whip the heavy cream using an electric mixer on medium speed until you get nice stiff peaks—fluffy but firm. Just be careful not to overdo it, or it might start to curdle. Once it’s whipped, scoop it into a medium bowl and pop it in the fridge to keep cool until you need it.
- No need to clean the mixing bowl—yay! In the same bowl, beat together the cream cheese, Lotus Biscoff spread, powdered sugar, and a pinch of salt until it’s all super smooth and creamy.
- Now grab your rubber spatula and gently fold the chilled whipped cream into the cream cheese mixture. Take your time and mix until the color is uniform and there are no white streaks left. You’re looking for a thick, cloud-like filling that holds its shape—not runny.
- Spoon the filling onto your cooled cookie crust, and spread it out into an even layer using an offset spatula or the back of a spoon. Smooth out the top so it looks nice and neat.
- Cover the pan tightly with plastic wrap and let it chill in the fridge for at least 5 to 6 hours, or even better—overnight—until it’s set and ready to slice!
To Serving:
- Once your cheesecake is nice and chilled, grab a sharp knife and gently run it around the edge to loosen it from the pan. Carefully remove the springform rim. Now for the lift! Use a thin, wide spatula, a cake lifter, or even the removable bottom of a tart pan to slide the cake off the base—the parchment round should come off easily. Place your cheesecake on a pretty serving platter.
- Next, microwave the rest of your Lotus Biscoff spread in a microwave-safe bowl for about 40 seconds, just until it’s super melty and pourable.
- Now for the fun part! Grab a piping bag or a small zip-top bag with the corner snipped off and drizzle some of the warm spread around the edge of the cake to create that gorgeous drip effect. Then pour the rest of it right on top and quickly spread it out into a smooth, even layer.
- Pop the cheesecake back into the fridge for at least 10 minutes so the topping can set. Once it’s firm, sprinkle the reserved cookie crumbs around the sides for that extra crunch and visual wow.
- For nice clean slices, dip a sharp knife in hot water, wipe it dry, and slice. Wipe the blade clean between each cut for the best-looking slices. Decorate with the last 2 Lotus cookies on top, and feel free to add some fresh berries around the platter for a pretty touch!
- Serve your cheesecake cold, straight from the fridge. Cover any leftovers and keep them in the refrigerate for up to 5 days, or freeze slices for up to a month (maybe even longer!).
Notes
- You’ll need a 400g jar of Lotus Biscoff spread—use 260g for the filling and 140g for the topping.
- A 250g pack of Lotus cookies (32 cookies) is perfect: 30 for the crust and garnish, and 2 for decoration.
- Smooth spread works best, but crunchy is fine too! Use full-fat brick-style cream cheese (like Philadelphia) for the creamiest texture.
Pin this delicious recipe on Pinterest to save and share it with your foodie friends!

This dreamy no-bake Biscoff acheesecake is rich, creamy, and layered with cookie butter magic—easy to make, hard to resist! 🍰✨🧡