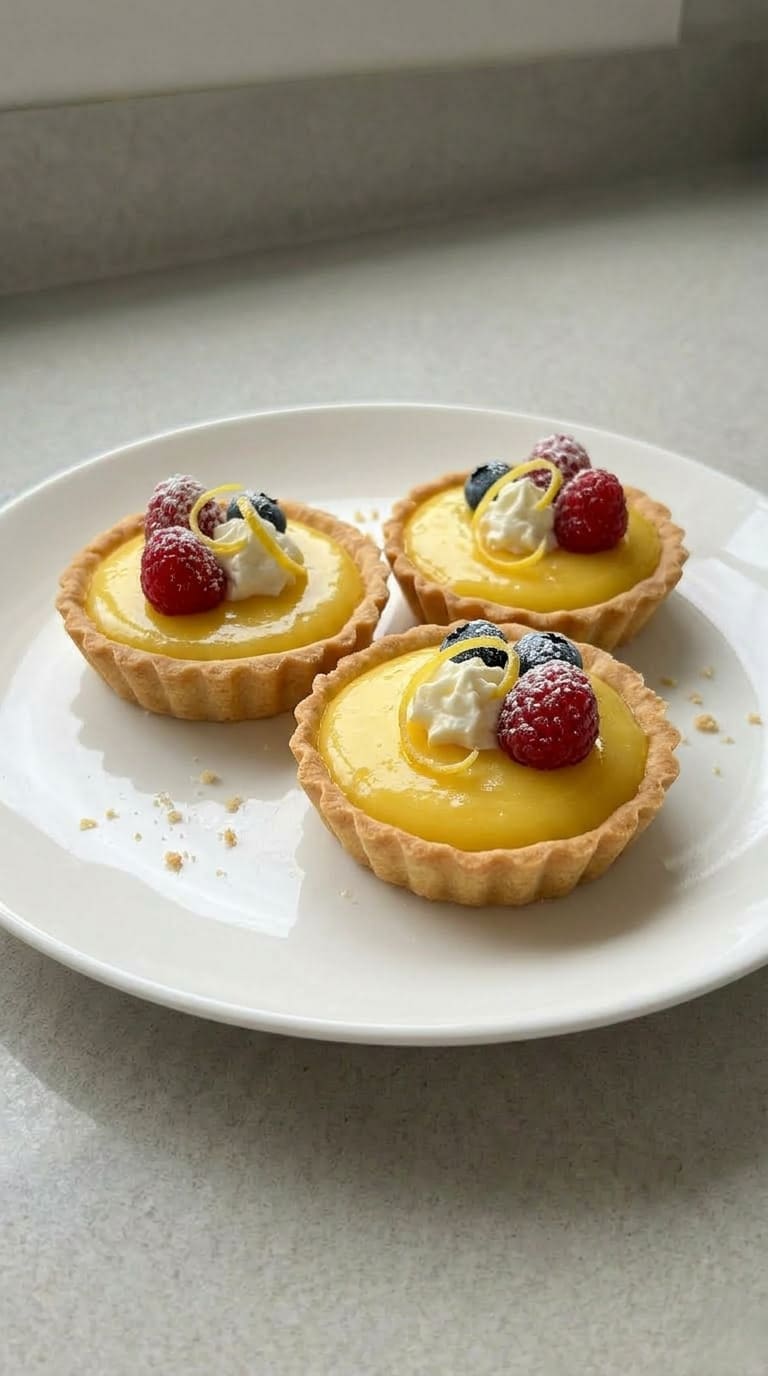
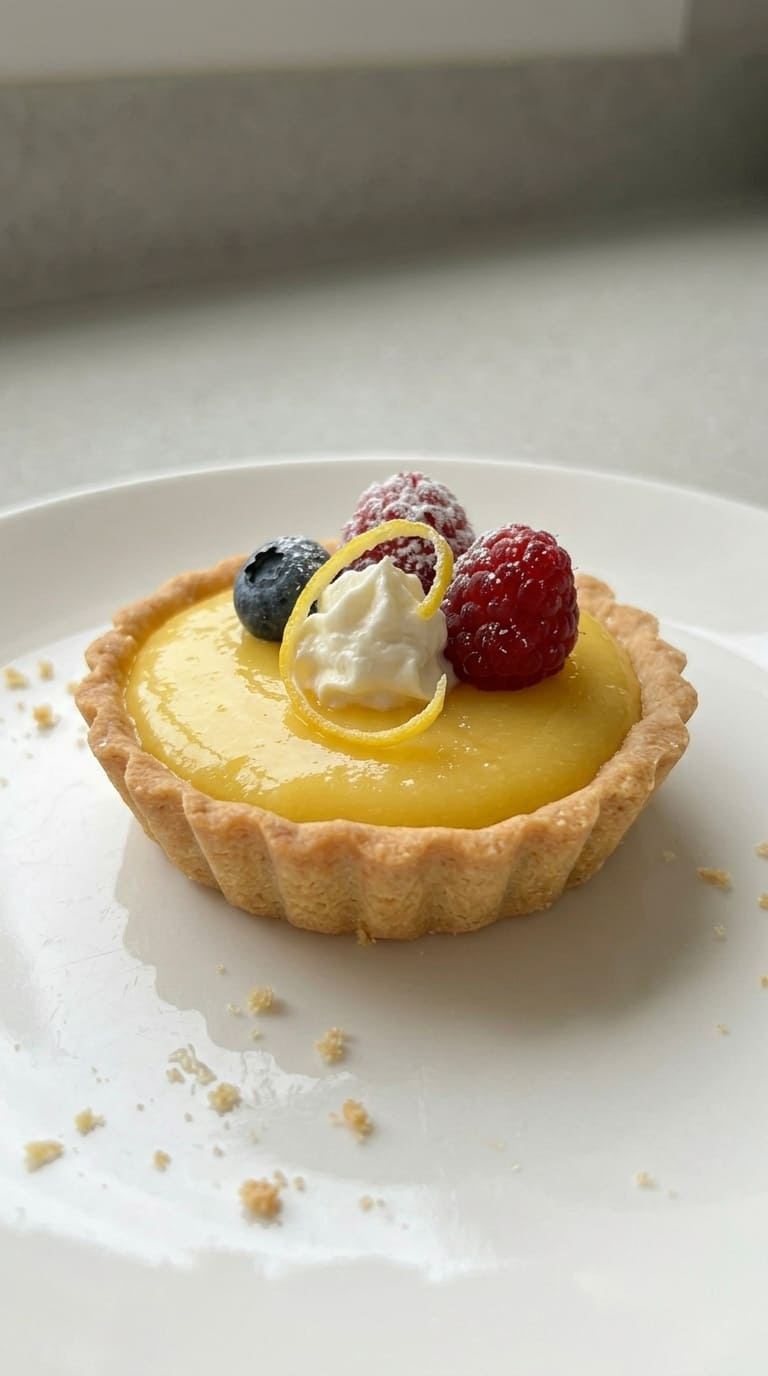
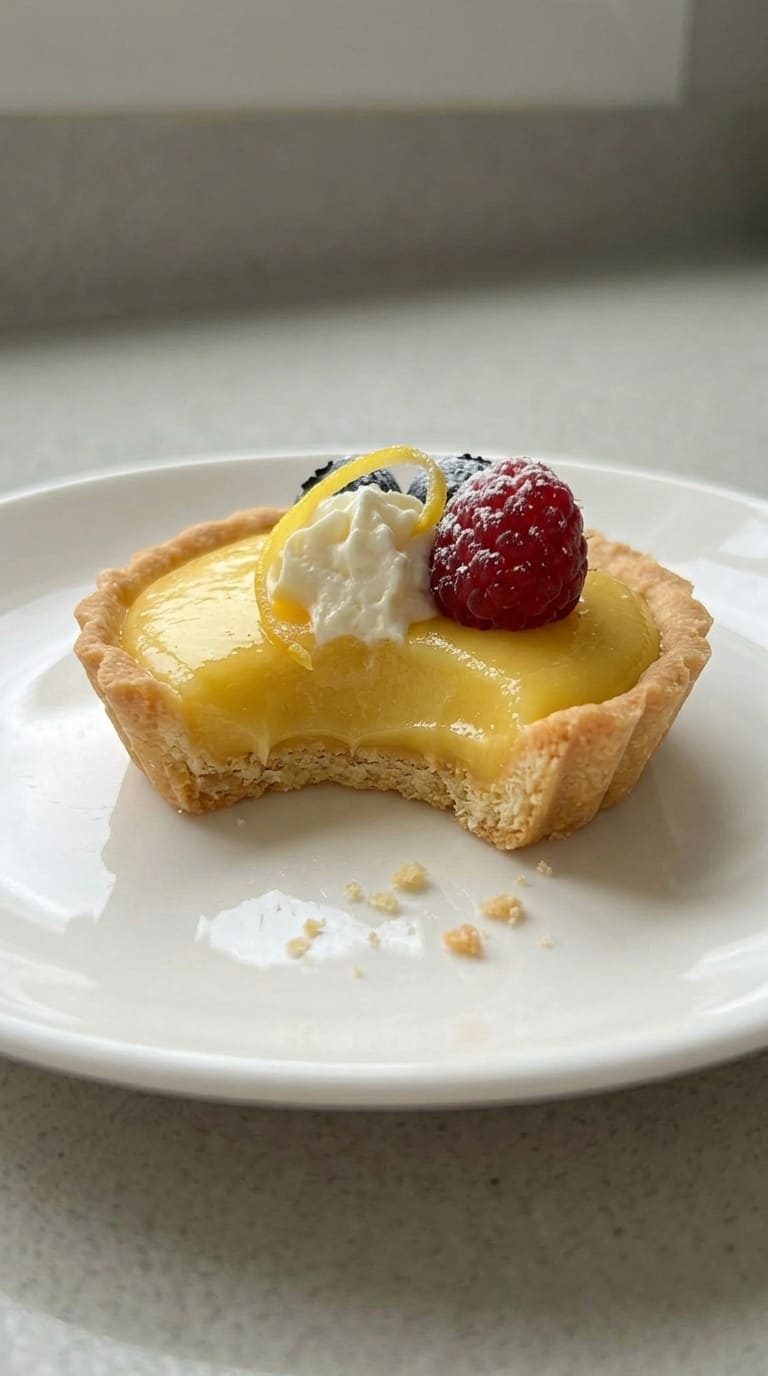
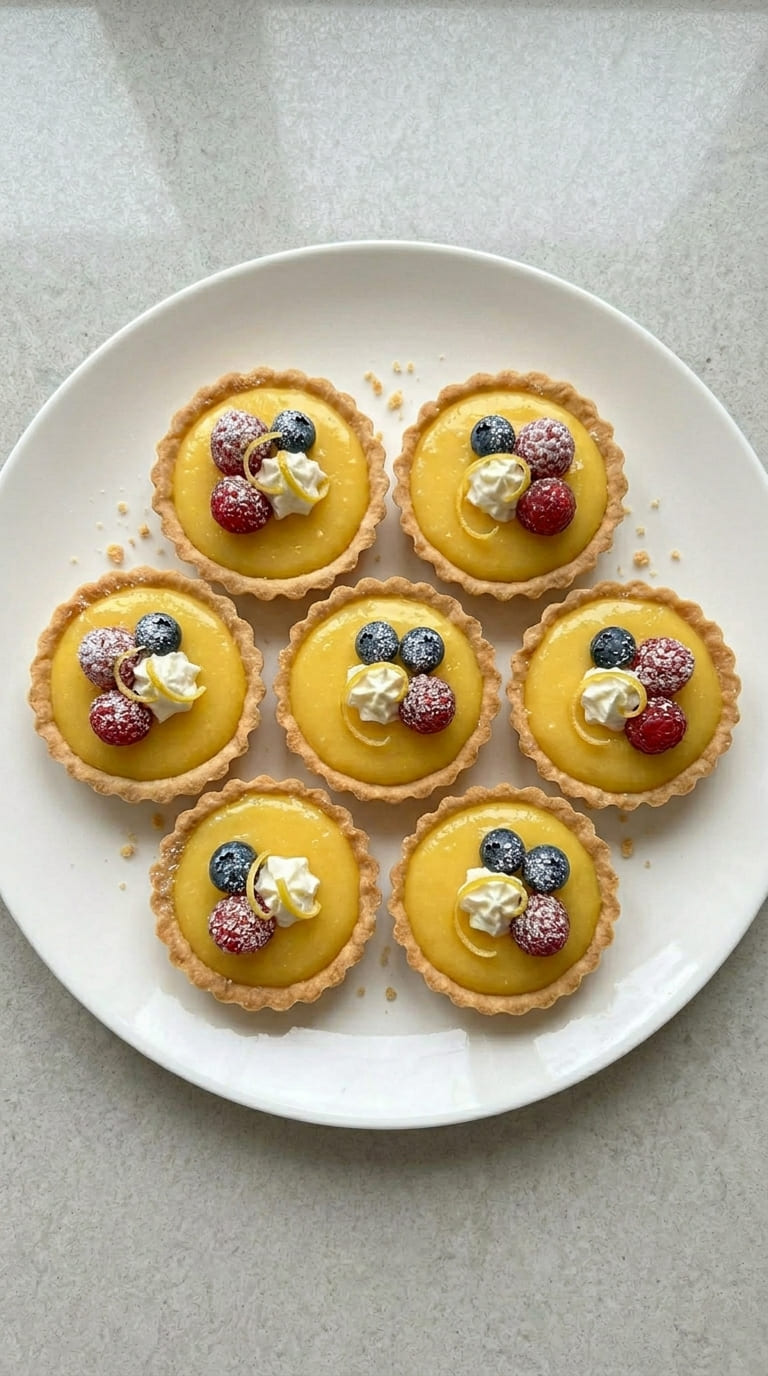
Lemon Curd Tarts are bite-sized desserts bursting with zesty citrus flavor and silky smooth lemon curd. Nestled in a buttery, crisp tart shell and finished with a glossy top, these tarts are the perfect balance of tart and sweet—elegant enough for entertaining, yet simple enough for everyday treats.
Refreshing Lemon Curd Tarts Perfect for Your Next Gathering
Why You’ll Love These Lemon Curd Tarts
-
Bright, Tangy Lemon Flavor: The lemon curd is made with fresh lemon juice and zest for vibrant citrus notes.
-
Velvety Smooth Filling: Rich, creamy texture that melts in your mouth.
-
Crisp, Buttery Shells: Perfect contrast to the luscious curd, holding up beautifully without getting soggy.
-
Mini and Elegant: Great for tea parties, bridal showers, or sophisticated dessert tables.
-
Make-Ahead Friendly: Both the shells and curd can be prepared in advance for easy assembly.
Perfect for Any Occasion
Whether you’re celebrating spring holidays, hosting a brunch, or craving something tangy and sweet, Lemon Curd Tarts fit right in. They add a pop of sunshine to any table and are sure to impress guests with their polished look and refreshing flavor.
Refreshing Lemon Curd Tarts Perfect for Your Next Gathering
To make these super-easy Mini Lemon Tarts, you’ll only need a few basic ingredients:
For the Shortcrust Pastry:
- Dry Ingredients: Plain/AP Flour, Salt, and Icing Sugar (or Powdered Sugar).
- Wet Ingredients: Very cold Unsalted Butter and a medium-sized Egg (at room temperature).
- You can also add lemon zest to the pastry for an extra lemony flavor boost!
For the Lemon Curd:
- Eggs: Yolks only, at room temperature.
- Lemon: Both Juice and Zest. Fresh lemon juice is preferred, but bottled lemon juice works too.
- Sugar: Caster/Fine Granulated White Sugar.
- Butter: Unsalted and at room temperature. Make sure it’s not too cold to prevent the curd from splitting when you add it to the pot.
Here are some tips for making perfect lemon curd Tarts:
- Cook the curd on very low heat to prevent overcooking the eggs or burning the curd. It might take longer, but your lemon curd will be smooth without any lumps.
- Chill the Tarts in the fridge for at least 2 to 3 hours so the curd can set properly. If you don’t chill them long enough, the curd might be too runny and leak out of the shells when you bite into them.
- You can make both the tartlet shells and the curd ahead of time and assemble them a few hours before serving. Store the tartlet shells at room temperature for up to 2 days and the lemon curd in the fridge for up to 3 days. Before filling the tart crusts, gently warm up the curd to loosen it, then refrigerate again for 2 to 3 hours to set.
- Experiment with different citrus flavors by replacing the lemon with Meyer lemons, oranges, limes, or your favorite citrus fruit.
- Use a mini muffin pan instead of a regular muffin pan to make bite-sized desserts. If using a mini muffin pan, roll the pastry thinner for best results.
Refreshing Lemon Curd Tarts Perfect for Your Next Gathering
RECIPE FAQS
Can I use pre-made Tart Shells?
Yes, you can use store-bought tartlet shells to make these Lemon Butter Tarts, although I always suggest making your own pastry for better flavor.
Can I use store-bought Lemon Curd?
You can definitely make these Lemon Tarts using a jar of Lemon Curd from the supermarket. However, I personally prefer making my own Lemon Curd so I can adjust the level of sweetness and tanginess to suit my taste preferences.
Can these mini lemon tarts be made in advance?
You can prepare both the pastries and the curd ahead of time and assemble them a few hours before serving. The baked crusts can be stored at room temperature for up to 2 days, while the curd can be refrigerated for up to 3 days. Just fill the tart crusts with the curd 2 to 3 hours before serving and chill them in the fridge until set.

Refreshing Lemon Curd Tarts Perfect for Your Next Gathering
STORING & FREEZING
- As mentioned earlier, you can store the unfilled crusts at room temperature for up to 2 days and the curd in the fridge for 3 days. Once assembled, the lemon curd Tarts should be refrigerated and will remain crispy for 2 days.
- You can freeze the tartlet crusts, either raw or baked, but I don’t recommend freezing the filled tarts or the lemon curd.
Serving Suggestions
-
With Fresh Raspberries or Blueberries: Adds color and another layer of flavor.
-
With Whipped Cream: A light swirl of whipped cream makes for a dreamy topping.
-
With Tea or Prosecco: Ideal pairing for afternoon tea or light celebrations.
-
As a Dessert Platter Addition: Add alongside chocolate truffles and shortbread for variety.
-
With a Mint Garnish: Just a small mint leaf adds elegance and fragrance.
Small But Mighty Citrus Gems
Lemon Curd Tarts are sunshine in a shell—vibrant, smooth, and bursting with flavor. They’re everything a lemon lover dreams of: tangy, creamy, and just sweet enough. Make a batch and bring a little brightness to your next gathering!
Refreshing Lemon Curd Tarts Perfect for Your Next Gathering
Love lemons? Be sure to check out these other delicious lemon recipes!

Mini Lemon Curd Tarts
Ingredients
Tartlet
- 250 grams 1 2/3 cup AP / Plain Flour
- 50 grams 1/2 cup Icing Sugar - sifted
- 1 pinch Fine Salt
- 120 grams 1/2 cup Unsalted Butter - cold
- 1 Egg - at room temperature
Lemon Curd
- 4 Egg Yolks
- 100 grams 1/2 cup Caster Sugar - or fine white granulated sugar
- 125 ml 1/2 cup Lemon Juice - around 3 large lemons
- 75 grams 5 tbsp Unsalted Butter - at room temperature
- 1 Lemon Zest - optional
Instructions
Tartlet Shells
- Start by adding the flour, icing sugar, and a pinch of salt to your food processor. Give it a few quick pulses to mix everything together.
- Next, toss in the cold butter cubes and pulse again until the mixture looks like fine, crumbly sand.
- Crack an egg into a small bowl and whisk it up. Pour it into the processor and pulse slowly until a dough starts to come together.
- Shape the dough into a ball, then roll it out between two sheets of baking paper until it's about 4 mm thick (around 1/6 inch). Pop it into the fridge to chill for at least 1 hour—you can even leave it overnight if that’s easier.
- Once chilled, peel off the baking paper and cut out circles using a cookie cutter just a bit wider than your muffin pan openings. Gently press the pastry rounds into the muffin pan, making sure they’re snug and touching all sides to avoid air bubbles.
- Tip: A muffin pan with a perforated bottom helps the shells bake more evenly and reduces shrinkage!
- Chill the shells again for at least 2 hours—overnight is even better if you’ve got the time.
- When you're ready to bake, preheat the oven to 160°C (325°F). Prick the bottoms of the tartlet shells with a fork and pop the muffin pan in the freezer while the oven warms up.
- Now line each shell with a little piece of crumpled baking paper and fill with baking beads (or rice or beans—whatever you’ve got on hand). Bake for 15 minutes, then carefully remove the weights and paper, and bake for another 15 minutes until the shells are golden and dry to the touch. Let them cool completely before filling.
Lemon Curd
- In a small pot, whisk together the egg yolks, sugar, and lemon juice until nice and smooth. Set the pot over low heat—gentle is key here!
- Keep whisking for about 3 to 5 minutes until the mixture starts to thicken just a little.
- Cut the butter into small cubes and add them in gradually, whisking after each addition until fully melted and combined. Stir in the lemon zest.
- Continue cooking over low heat for another 5 to 15 minutes, whisking constantly. You’ll know the curd is ready when it thickens enough to coat the back of a spoon. To test it, dip in a spoon and run your finger through the curd—if the line stays clean and the curd doesn’t run over it, you’re good to go!
Assembling the Lemon Tarts
- While the lemon curd is still warm and silky, pour it into your cooled tartlet shells. Give each tartlet a gentle tap on the counter to pop any air bubbles.
- Chill them in the fridge for at least 2 to 3 hours so the curd sets up nicely.
- And that’s it—your zesty, golden lemon tarts are ready to shine! 🍋✨
Mari
Traducir al español
Holly Henry
Ingredientes
Tartaletas
250 gramos (1 2/3 tazas) de harina de trigo común (harina todo uso)
50 gramos (1/2 taza) de azúcar glas – tamizada
1 pizca de sal fina
120 gramos (1/2 taza) de mantequilla sin sal – fría
1 huevo – a temperatura ambiente
Lemon Curd (Crema de Limón)
4 yemas de huevo
100 gramos (1/2 taza) de azúcar blanca fina (azúcar caster o granulada)
125 ml (1/2 taza) de jugo de limón – aproximadamente 3 limones grandes
75 gramos (5 cucharadas) de mantequilla sin sal – a temperatura ambiente
Ralladura de 1 limón – opcional
Instrucciones
Masa para Tartaletas
Empieza añadiendo la harina, el azúcar glas y una pizca de sal al procesador de alimentos. Pulsa unas cuantas veces para mezclar bien los ingredientes.
Agrega los cubos de mantequilla fría y vuelve a pulsar hasta que la mezcla tenga una textura parecida a arena fina y desmenuzada.
Bate el huevo en un cuenco pequeño y viértelo en el procesador. Pulsa suavemente hasta que la masa comience a formarse.
Forma una bola con la masa, luego extiéndela entre dos hojas de papel de hornear hasta que tenga un grosor de unos 4 mm (aproximadamente 1/6 de pulgada). Lleva la masa al refrigerador durante al menos 1 hora. Si prefieres, puedes dejarla reposar toda la noche.
Una vez que esté fría, retira el papel de hornear y corta círculos con un cortador de galletas un poco más grande que el diámetro de los moldes para muffins. Presiona con cuidado los círculos de masa dentro de los moldes, asegurándote de que se adhieran bien a los bordes para evitar burbujas de aire.
Consejo: un molde para muffins con fondo perforado ayuda a que las tartaletas se horneen de manera uniforme y evita que se encojan.
Vuelve a refrigerar las bases durante al menos 2 horas (idealmente toda la noche si tienes tiempo).
Cuando vayas a hornear, precalienta el horno a 160 °C (325 °F). Pincha el fondo de cada base con un tenedor y coloca el molde en el congelador mientras se calienta el horno.
Luego, coloca un pequeño trozo de papel de hornear arrugado dentro de cada base y rellénalo con pesos para hornear (puedes usar arroz o legumbres si no tienes). Hornea durante 15 minutos, luego retira cuidadosamente los pesos y el papel, y hornea otros 15 minutos más, hasta que las tartaletas estén doradas y secas al tacto. Déjalas enfriar por completo antes de rellenar.
Crema de Limón (Lemon Curd)
En una olla pequeña, bate las yemas, el azúcar y el jugo de limón hasta que la mezcla esté suave y bien integrada. Coloca la olla a fuego bajo—¡la clave es que el calor sea suave!
Sigue batiendo durante unos 3 a 5 minutos hasta que la mezcla comience a espesar ligeramente.
Corta la mantequilla en cubos pequeños y añádela poco a poco, batiendo después de cada adición hasta que se derrita y se mezcle por completo. Incorpora la ralladura de limón si lo deseas.
Continúa cocinando a fuego bajo durante otros 5 a 15 minutos, batiendo constantemente. Sabes que la crema está lista cuando espese lo suficiente como para cubrir el dorso de una cuchara. Para comprobarlo, sumerge una cuchara, pásale un dedo por el centro: si la línea se mantiene limpia y la crema no se desliza, ¡ya está perfecta!
Montaje de las Tartaletas de Limón
Mientras la crema de limón aún está caliente y sedosa, viértela en las tartaletas ya frías. Da unos golpecitos suaves sobre la encimera para eliminar burbujas de aire.
Refrigéralas durante al menos 2 a 3 horas para que la crema se asiente bien.
¡Y listo! Tus tartaletas doradas y cítricas están listas para brillar. 🍋✨