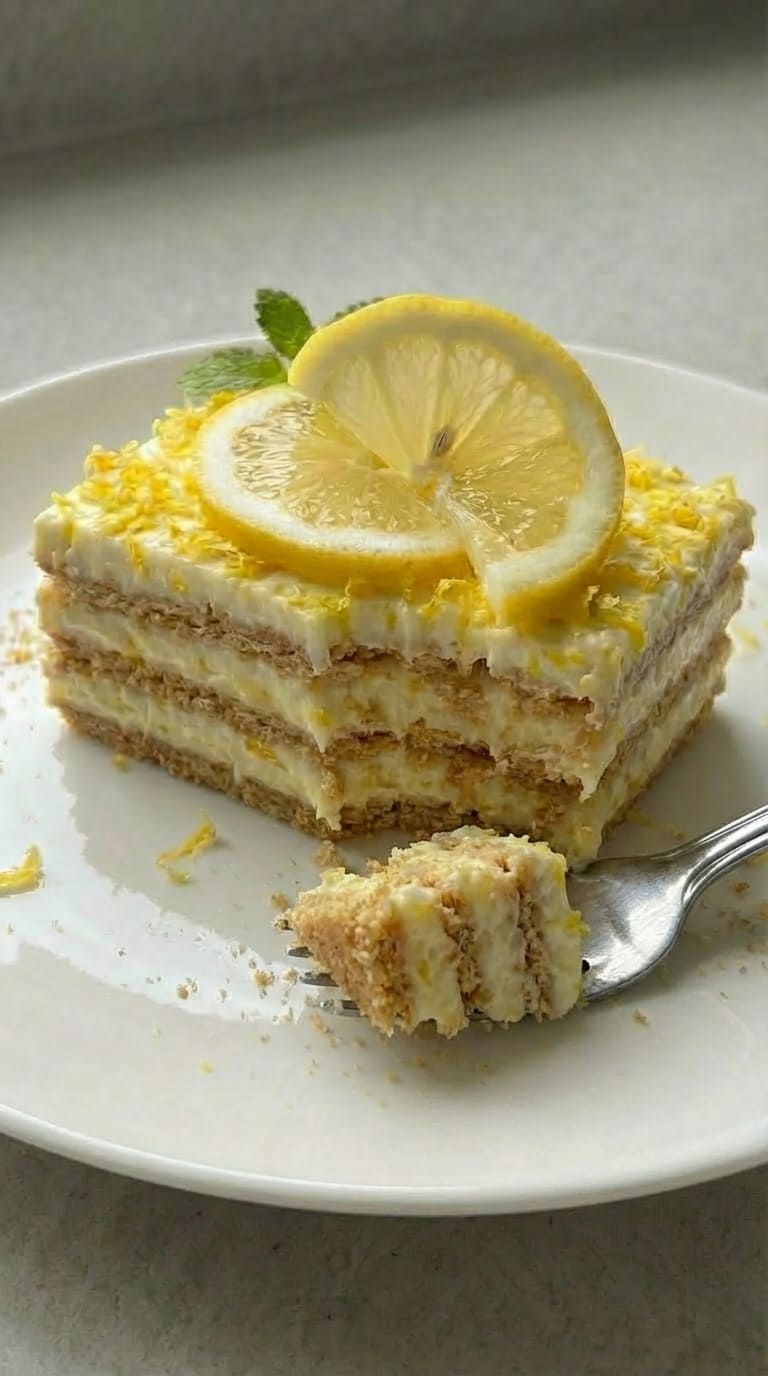
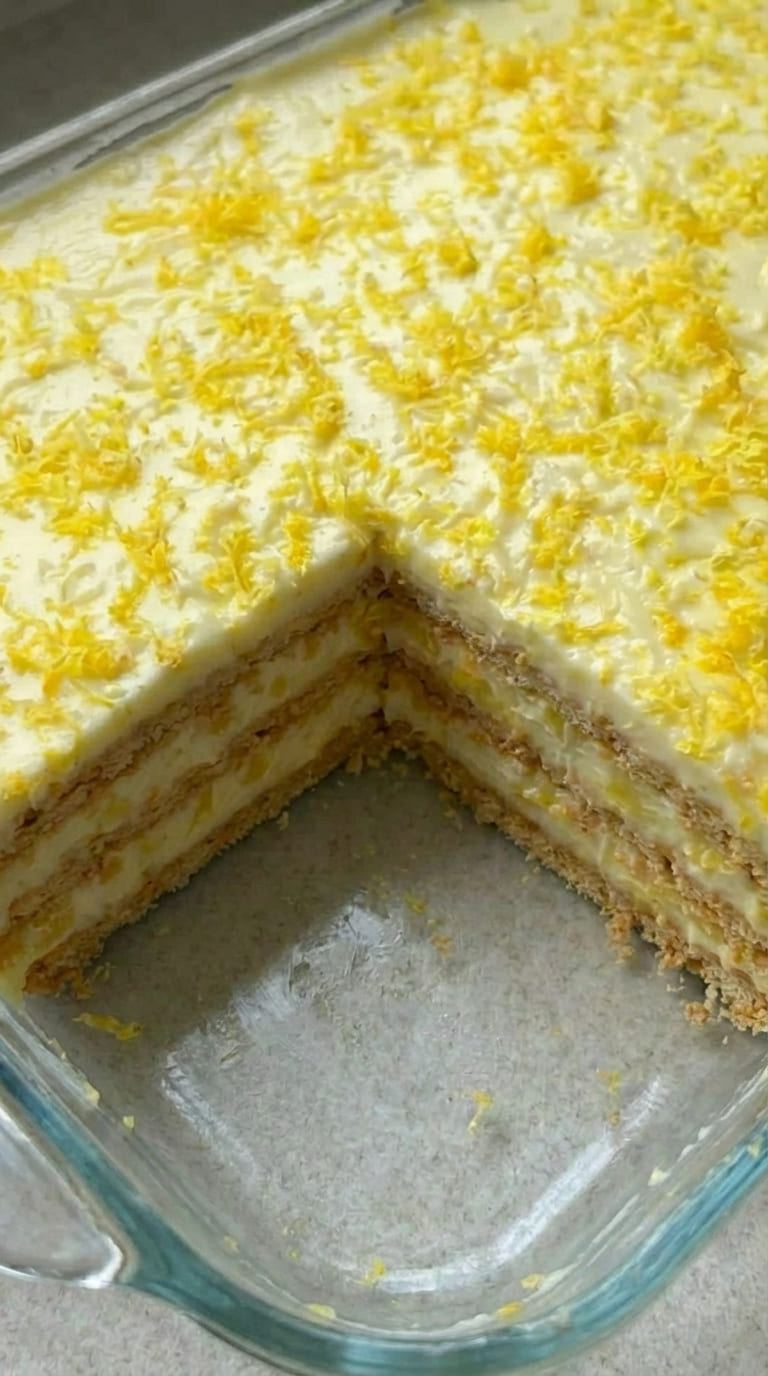
This Lemon Icebox Cake is a refreshing, no-bake dessert layered with creamy lemon filling and soft graham crackers that transform into a cake-like texture as it chills. Light, citrusy, and incredibly easy to assemble, it delivers a cool, bakery-style treat that is perfect for warm weather and effortless entertaining.

Easy Lemon Icebox Cake – No Bake & Perfectly Refreshing
Each layer is smooth and tangy with bright lemon flavor, balanced by the subtle sweetness of whipped topping and softened graham crackers. After chilling, the layers meld together into a soft, sliceable dessert that feels indulgent yet refreshing.
Why This Lemon Icebox Cake Is a High-Performing Recipe
- No-Bake Convenience: No oven required, ideal for quick preparation.
- Bright Citrus Flavor: Fresh lemon juice enhances the pudding for a vibrant taste.
- Creamy, Smooth Texture: Cream cheese and whipped topping create a rich, fluffy filling.
- Perfect Make-Ahead Dessert: Chilling overnight improves texture and flavor.
- Feeds a Crowd: Large 9×13 format makes it ideal for gatherings.
- Budget-Friendly Ingredients: Uses accessible pantry staples with premium results.
Perfect for Any Occasion
Lemon Icebox Cake is perfect for summer parties, potlucks, BBQs, family gatherings, or holiday dessert tables. Its chilled, refreshing texture makes it especially popular during hot weather. Serve straight from the fridge for clean slices and the best consistency.
Ingredient Notes
Lemon Cream Filling
- Cream cheese: Beaten until fluffy to create a smooth, rich base.
- Instant lemon pudding mix: Provides structure, sweetness, and bold lemon flavor.
- Fresh lemon juice: Enhances brightness and adds natural citrus depth.
- Vanilla extract: Rounds out and balances the flavors.
- Milk: Helps dissolve the pudding mix and create a creamy consistency.
- Cool Whip: Folded in for a light, airy texture.
Layers
- Graham crackers: Soften during chilling to create cake-like layers.
Garnish
- Lemon zest: Adds fresh aroma and visual appeal.
- Fresh berries: Optional, but provide color contrast and a tart finish.
Easy Lemon Icebox Cake – No Bake & Perfectly Refreshing
Tips for the Best Lemon Icebox Cake
- Beat Cream Cheese Smoothly: Start with softened cream cheese to avoid lumps.
- Mix Gradually: Add milk slowly to maintain a smooth consistency.
- Layer Evenly: Spread filling evenly between cracker layers for uniform slices.
- Chill Thoroughly: Refrigerate overnight for best results, or freeze for quicker setting.
- Let It Soften Slightly: If frozen, rest before slicing for a softer texture.
- Use Fresh Garnish: Add lemon zest and berries just before serving.
Serving Suggestions
- Classic Squares: Slice into neat portions for easy serving.
- Berry Topping: Add raspberries or strawberries for a fresh contrast.
- Extra Cream Layer: Top with additional whipped topping for a bakery finish.
- Summer Dessert Table: Pair with fruit-based desserts for variety.
- Chilled Dessert Cups: Serve in individual portions for events.
Easy Lemon Icebox Cake – No Bake & Perfectly Refreshing
A Must Try
This Lemon Icebox Cake is creamy, refreshing, and packed with bright citrus flavor, offering a simple yet impressive dessert that requires minimal effort. With its soft layers and smooth filling, it is a reliable, crowd-pleasing recipe that delivers consistent results and a polished presentation every time.

Easy Lemon Icebox Cake – No Bake & Perfectly Refreshing
Ingredients
- 1 box graham crackers 14.4 oz
- 8 oz cream cheese softened
- 6.8 oz instant lemon pudding mix 2 boxes of 3.4 oz instant pudding mix
- ½ cup freshly squeezed lemon juice 4 lemons
- 2 tsp vanilla extract
- 2 ½ cups milk
- 8 oz Cool Whip 1 container
Instructions
- In a large bowl, take your softened cream cheese and beat it with a hand mixer for a couple of minutes, until it turns smooth, airy, and easy to spread. You want it nice and light, with no firmness left.
- Into that same bowl, add the instant lemon pudding mix, a splash of vanilla, and the fresh lemon juice. Beat again until the mixture comes together beautifully, smooth and evenly colored with a soft yellow hue.
- Now, slowly pour in the milk while mixing gently. Take your time with this step so the mixture stays creamy, working out most of the lumps as you go.
- Add the whipped topping and, using a rubber spatula, fold it in carefully. Do this gently, lifting and turning the mixture so it stays light and fluffy.
- Take a 9 x 13 casserole dish and spread a thin layer, about half a cup, of the pudding mixture across the bottom. This first layer helps everything settle nicely. Arrange a layer of graham crackers over it, fitting them snugly. Break a few pieces if needed to fill in the gaps, just like you would when building a proper layered dish.
- Spoon a portion of the pudding mixture over the crackers and smooth it out evenly. Continue layering in the same manner, crackers followed by pudding, until everything is used up, finishing with a layer of the creamy mixture on top.
- Place the dish in the freezer for about 4 hours, or let it rest in the refrigerator overnight if you prefer a softer set.
- Before serving, take it out and let it sit at room temperature for 15 to 20 minutes so it softens slightly, making it easier to slice. Just before bringing it to the table, sprinkle over a little fresh lemon zest and scatter some berries for a bright, fresh finish.