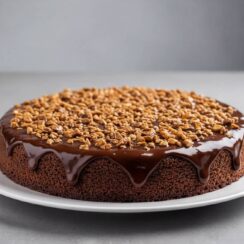
Chocolate Almond Cake – Rich, Moist & Absolutely Decadent
This Chocolate Almond Cake is a decadent dessert that combines rich chocolate with the nutty goodness of almonds! 🍫🌰 Moist, tender cake layers are infused with deep chocolate flavor and a hint of almond, creating a perfectly balanced treat that’s hard to resist.
Servings 12
Ingredients
For the chocolate almond cake
- 6 eggs at room temperature
- 1 tsp salt
- 250 gram icing sugar
- 150 gram unsalted butter cold at room temperature
- 300 gram almond flour
- 50 gram cocoa powder 100% cacao
For the ganache
- 200 gram Dark chocolate 65% cacao
- 200 gram whipping cream 30-35% fat content
- 50 gram granulated sugar
For the hazelnut praline
- 100 gram granulated sugar
- 100 gram hazelnuts or almonds or peeled pistachios
Instructions
For the chocolate almond cake
- Start by beating the eggs, salt, and icing sugar with an electric mixer. Keep going until the mixture turns pale, fluffy, and airy—like a soft cloud! A fun trick to know it’s ready: try drawing a figure with the batter on its surface. If your doodle stays for a few seconds before sinking in, you’ve nailed it.
- Next, lower the speed and add the butter one tablespoon at a time. Keep mixing gently until all the butter disappears into the batter.
- Now, grab a spatula! Mix the almond flour and cocoa powder together, then fold them into your fluffy egg mixture in two parts. Be gentle—think of it like giving the batter a cozy hug to keep all that lovely air inside.
- Pour the finished batter into a baking pan (25 cm (10-inch) springform pan) that you’ve already buttered. I like to take it a step further by cutting a piece of baking paper to fit the base and sticking it down with a little butter—makes removing the cake a breeze!
- Pop it into a preheated oven at 170°C (340°F) and bake for 30–40 minutes. It’s done when a toothpick or knife poked into the center comes out clean. Let it cool completely before you spread that dreamy ganache on top.
For the ganache
- Pour the cream and sugar into a small saucepan and place it over medium heat. Warm it up until it starts to steam—don’t let it boil! Stir constantly so the sugar melts nicely. If it accidentally boils and breaks (looks separated), just let it cool down a bit before moving on.
- Melt your chocolate in a heatproof bowl. You can use the microwave—just heat it in 30-second bursts, stirring between each one until smooth. Or, use the classic bain-marie method: place the bowl over a pot of simmering water (make sure the bottom of the bowl doesn’t touch the water!).
- Once your chocolate is fully melted, take it off the heat if you were using the bain-marie. Pour all the warm cream over the melted chocolate.
- Now for the fun part! Use a spatula to stir slowly in small circles right at the center of the bowl. Watch as the ganache starts coming together like magic and slowly spreads out toward the edges.
- Once the whole mixture looks rich, dark, and glossy, scrape down the sides of the bowl and stir until it’s all beautifully smooth and shiny.
- Let it cool until it thickens up to a fudgy texture—kind of like dulce de leche. Give it a little stir now and then to help it cool evenly. It should be at room temperature when it’s ready. If the room is cold, this might take 20–30 minutes; if it’s warm, it could take closer to an hour.
- Now whip the ganache on high speed using an electric mixer. This step adds air and makes it fluffy and creamy! If you’re using a stand mixer, pause now and then to scrape down the sides and bottom with a spatula. Stop whipping once it looks light, smooth, and dreamy.
- Spread the whipped ganache onto your cake right away. If you wait too long, it’ll start to firm up. No worries though—if that happens, just beat it again on low speed to bring it back to life!
For the hazelnut/almond praline
- Caramel may not look dangerous, but it gets super hot—so be extra careful and keep little ones at a safe distance while you're making it.
- To start, make sure your pan is squeaky clean—no grease or crumbs allowed! Any leftover bits can make the caramel crystalize. A light-colored pan is ideal so you can clearly see the sugar change color. Sprinkle a thin, even layer of sugar into the pan, then place it over medium heat.
- As soon as the sugar starts melting—usually around the edges—lower the heat to medium-low. Now sprinkle a bit more sugar over the melted spots, again in a thin layer. No stirring with spoons or spatulas here! Instead, gently swirl or tilt the pan by the handle to move things around if needed.
- Keep an eye on the heat so the caramel doesn’t burn. Let it slowly melt into a lovely golden color, swirling the pan every now and then to keep things moving evenly.
- Once your caramel is fully melted and golden, toss in the nuts and give it a quick stir right away (now’s the only time to use a utensil!). Quickly pour the caramel and nut mixture onto a silicone mat, silpat, or a greased surface.
- Let it cool down completely, then chop it up or pulse it in a food processor. Sprinkle the crunchy caramel over your ganache just before serving for an irresistible finishing touch!
Notes
- Melt the unsalted butter either in the microwave for about 20 seconds or on the stovetop over medium heat.
- One key to this upside-down cake is flipping it while it's still hot. If any caramelized almonds stick to the bottom of the cake pan, you can reheat the pan briefly in the oven or on a low flame to loosen them. Gently scrape off any stuck almonds and place them back on top of the cake.