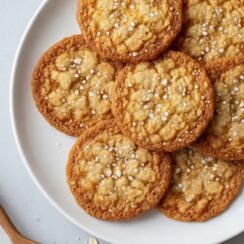
Oatmeal Lace Cookies – Thin, Crispy & Buttery Delicious
These Oatmeal Lace Cookies are pure elegance! Thin, delicate, and crispy with buttery caramel flavor, they're surprisingly easy to make. The lacy appearance makes them look fancy, but they come together with simple ingredients. Perfect for cookie platters, tea parties, holiday gifts, or impressing guests with minimal effort!
Servings 40 thin lace cookies
Ingredients
- 80 g ¾ cup rolled oats
- 20 g all purpose flour 2 tablespoon or gluten free flour
- 115 g 1 stick unsalted butter
- 100 g ½ cup brown sugar ½
- 50 g ¼ cup white sugar
- ⅛ teaspoon sea salt
- 2 tablespoon cream
- 1 teaspoon vanilla extract
- 1 zest of lemon
Instructions
Preparing the Brown Butter
- Set the butter in a sturdy saucepan and place it over medium to medium-high heat. Allow it to melt gently, stirring continuously so it heats evenly. As the butter melts, it will begin to bubble and simmer. Soon after, the milk solids will separate and settle at the bottom of the pan.
- At this stage, lower the heat slightly. This gives you better control and keeps the butter from rushing past the perfect moment. The milk solids will turn from pale yellow to a rich golden color very quickly, so stay close and continue stirring or whisking to prevent scorching.
- Once the butter reaches a shade just lighter than deep golden brown, remove it from the heat. Remember, the heat of the pan will continue to deepen the color. Use the butter right away, or transfer it to a heat-safe bowl until you are ready to proceed.
Mixing the Lace Cookie Dough
- Place the oats into a small food processor and pulse until finely chopped. A hand chopper or knife works just as well if needed. Quick-cooking or steel-cut oats may also be used, measured by weight. Set aside.
- In a large mixing bowl, combine the brown sugar, white sugar, salt, flour, citrus zest, and the chopped oats. Stir until everything is evenly distributed.
- Pour in the hot brown butter, along with the vanilla. If the butter has cooled, warm it briefly so it is still hot when added. Using a rubber spatula, mix until the butter is fully absorbed and the mixture looks evenly moistened.
- Add the cream one tablespoon at a time, mixing after each addition, until the dough comes together. While warm, the dough will be quite soft. As it cools to room temperature, it will naturally thicken, which is exactly how it should be.
Baking the Cookies
- Heat the oven to 350°F or 180°C using conventional heat. Line a half-sheet pan with parchment paper or a silicone baking mat.
- Portion the dough using a tablespoon or cookie scoop, about 16 grams per portion for large cookies. For smaller cookies, divide each portion in half. Roll each piece gently between your palms to form smooth balls.
- Arrange the dough on the prepared baking sheet, leaving plenty of space between each piece, as these cookies spread generously. Place five large portions or seven small portions per tray.
- If using a light-colored metal pan, gently flatten each dough ball into an even circle using your fingers or the base of a flat glass.
- Bake until the cookies have spread thin, developed a lacy appearance, and turned a deep golden brown. Smaller cookies will take about seven to ten minutes, larger ones about ten to twelve minutes.
- Remove the tray from the oven and allow the cookies to rest briefly. While still warm, carefully lift them off the pan with a spatula and transfer to a wire rack to cool. Let the baking sheet cool completely before placing the next batch.
- Continue baking until all the dough is used. The recipe yields approximately twenty large cookies or forty smaller ones. The cookies are ready to serve once fully cooled.
Shaping and Cooling
- These cookies are lovely just as they are, but shaping must be done while they are still hot and flexible.
- For tidy rounds, press a sharp cookie cutter slightly smaller than the cookie straight down over each one while it remains on the pan. Do not twist. Once cooled, the excess edges can be removed cleanly.
- To form rolled or cigar-shaped cookies, carefully wrap a hot cookie around a lightly greased tube or a parchment-wrapped mold. Gently press the seam so it holds, then allow it to cool completely before removing.
Finishing Touches
- Serve the cookies plain to appreciate their delicate flavor and texture. If desired, drizzle or spread melted chocolate over the surface for a richer variation.